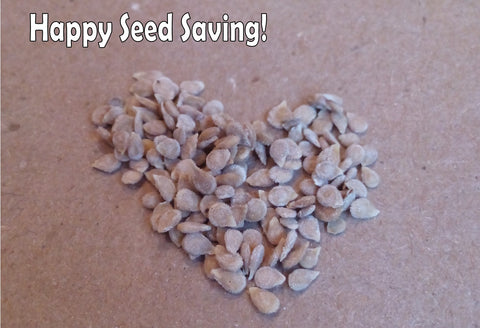
Your Guide to Saving Tomato Seeds
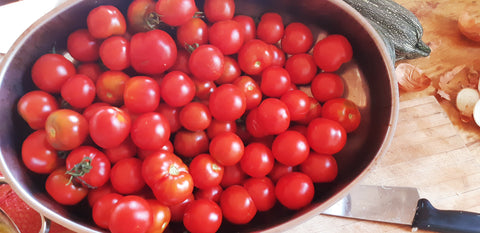
Your tomato patch has been feeding you and your family all Summer long; fresh salsa, salads, tomato sandwiches, pizza sauce, YUM. You’ve been eating so well! Now it’s September. You’ve been canning tomatoes for Winter soups, bottling salsa and pasta sauce. Summer was dry and hot so you even dried a few the ol’ fashioned way. It’s all so satisfying! You’re already thinking about next Spring’s seed wish-list.
Don’t get me wrong, we’ll welcome you back to browse our tomato selection with open arms, but if you grew some stellar tomatoes this year, why not try your hand at saving seeds from them yourself?
Saving seeds from your own garden opens up a whole new level of rewards.
- The overall pride that you’ve acquired yet another essential skill.
- Gathering seeds from your own garden creates genetic resilience for your area’s unique micro-climate.
- You can select seeds from what YOU consider to be the cream-of-the-crop.
- Gathering seeds immerses you even deeper into the sacred cycle of the seasons.
Before you rush out to get started, there are a few simple things to consider first:
- Are the tomatoes you’ve grown open pollinated? If you got your seeds from us, then the answer is YES. We only offer heirloom & heritage seeds. Heirloom and heritage seeds are all from open pollinated (OP) varieties. Unlike hybrids, seeds gathered from OP varieties will grow true the following year. *Read up on garden lingo here.*
- How far apart are your different varieties? Open pollinated seeds will grow true to type, so long as cross pollination doesn’t occur. In your gardens, you can get away with spacing “modern” tomato varieties 15ft apart. Old “potato leaf” varieties need a bit more space to keep their genetics clean; 100ft.
*Flowers of modern tomatoes look like stars. Flowers of older potato leafed varieties look almost like dandelions.
- How many tomato plants of one kind did you grow? We grow hundreds of tomato plants each year, but for back yard seed saving, we recommend gathering seeds from no less than 6 different individuals from the same variety. This ensures a broader gene pool.
- Do you have a plan for the tomato “meat”? Keeping seeds from larger tomatoes can leave a lot of waste unless you’re prepared. When collecting seeds from salad, slicer and paste tomatoes, we scoop out the seeds and preserve the rest. Saving tomato seeds for Incredible Seeds means we get to eat a lot of salsa all Winter! With cherry tomatoes it’s easier just to squish the whole tomato. *You'll love our family Salsa recipe!*
If you feel like you’ve got those bases covered. It’s time to pick some tomatoes! To avoid mix-ups, we recommend doing one variety at a time. When selecting which fruit you want to save from there are a few rules to go by:
- Choose only fully ripe tomatoes. Seeds from ripe tomatoes will have higher germination rates. Even slightly under-ripe tomatoes will have more undeveloped seeds that will not sprout.
- Pick more than you’ll need. Depending on the variety, there may be 60 or so seeds in each tomato; more than you’ll need for years! Even so, pick a few tomatoes from each plant (of the same variety). Again this gives you a nice big gene pool. You can share the extra seeds with your gardening buddies.
- Select for optimal variety traits. If you grew Berkley Tie-Dye, select only the biggest, stripiest and richest! If you grew Honey Drop, choose tomatoes from the sweetest plants. If you grew Aosta Valley, pick the shiniest fruit from the fullest clusters.
- Don’t save seeds from sub-par tomatoes! Deformed fruit, size, shape and colour variance, cracking and low tolerance for diseases are NOT genetic traits that you want to carry forward to the next generation of homegrown tomatoes.
Here are some of our rejects for Bloody Butcher:

Now it’s time to harvest your tomato seeds!
STEP 1: Cut tomatoes in half and scoop out the gel-like seeds into a clean container. With small cherries, crush the fruit directly into the container. Add a little bit of water.
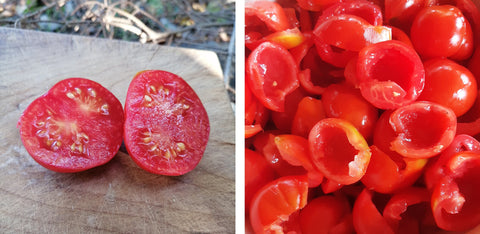
STEP 2: Cover your container with a lid or cheesecloth. Set it aside, at room temperature for 3-4 days. This is the fermentation step. During these few days, the gel coating on the seeds rots away. It’s okay if it gets mouldy!
STEP 3: After fermenting, give your mixture a quick stir. As it settles, all viable tomato seeds will sink to the bottom. All the pulp and junk seeds will float.

STEP 4: Add a plenty of water. Slowly and carefully pour off the pulp. Repeat a couple times until you are left with only seeds.
STEP 5: Strain seeds in a fine sieve and rinse again to clean them. Tap the sieve to knock off extra water.
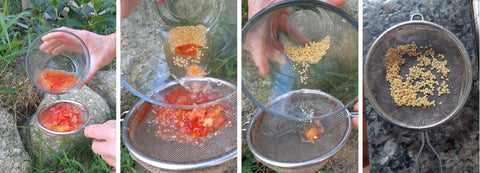
Step 6: Spread the seeds out onto a smooth surface for drying. Don’t forget to label them!
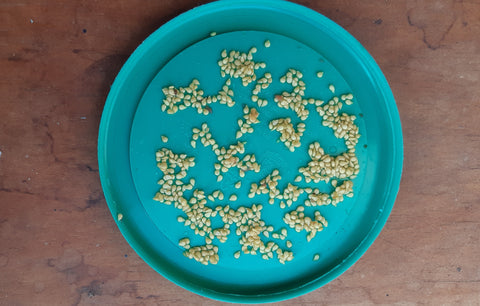
Step 7: Let your tomato seeds dry at room temperature for a few days. On the second day, gently rub any clumped seeds between your thumb and fingers to separate them.
STEP 8: When they are dry, store your seeds in a sealed container in a dry, dark, cool place. When stored properly, tomato seeds can maintain good germination for five years.
